SUNBURST and the importance of evidence-based risk management
 The last question you want to hear after a fire in your building is, ‘We have a backup …. right?’
Similarly, the last question you want to hear after a supply-chain attack, like the recent Sunburst catastrophe, is ‘We have what we need to determine if we were breached…right?”
Remediation for this type of event is often a time-consuming manual process involving reviewing logs, quarantining servers, and shutting down user credentials.
In Splunk’s suggestions on ways to detect malicious sunburst activity, it agrees that there will be clues on the network history itself. If the bad actor can enter the network via trojanized software updates they are able to move laterally and exfiltrate sensitive data. But the network activity leaves traces.
Evidence-based risk management strategies using what the network can tell us helps to determine the scope and impact of the breach and speed remediation.
MITRE ATT&K Framework: Detecting Lateral Movement and Privilege Escalation
Let’s examine two tactics used here in the MITRE ATT&K framework: Lateral Movement and Privilege Escalation. There are a few ways that you can use VIAVI tools to identify this type of behavior.
Lateral Movement: there are two main questions we need to ask about internal and external traffic.
- Did anything talk to a known ‘Command & Control’ server? (aka C2)
A Command & Control server is a machine that a cybercriminal uses to send commands to compromised devices in the system. For the Sunburst attack, FireEye has identified a list of these servers here. Using APEX, it is simple to create a filter for those IP addresses, search for the timeframe (in this case, many months) and have your answer instantly.
The timeframe of this compromise is an example of why having the packets to perform back in time analysis can be critical. - Did my compromised server talk to anything unusual internally?
‘Prevention is better than cure’ in cases like this. Having tools already in place, such as VIAVI Observer, with a whitelist of normal behavior combined with detection of any port scanning can save a lot of time.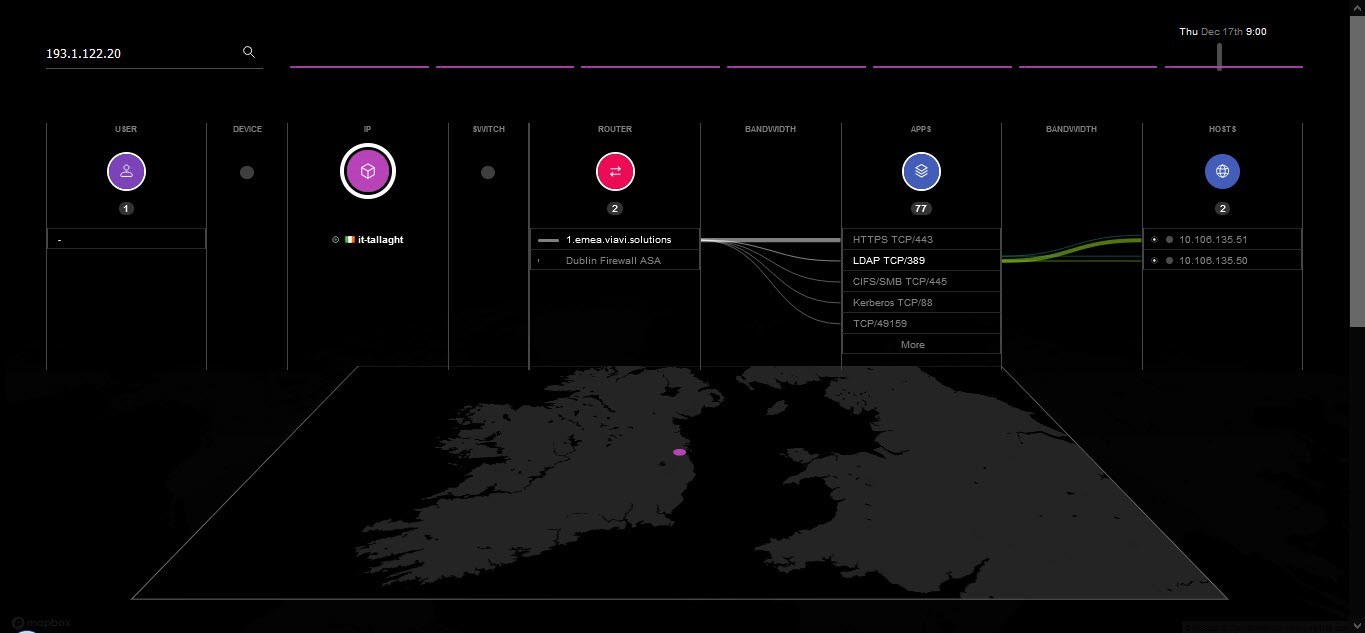
Figure 1: Enter a compromised IP and find MAC addresses, usernames, and app usage details associated with it.
Regardless of what you had in place, being able to visualize what happened historically is an important step in remediation. Here in Figure 1, the security engineer can see exactly what happened in its entirety without anything being dropped or summarized – which is critical in cases where you are trying to find sneaky malware! Tools that are simply designed to find ‘top talkers’ fall down when required to find a tiny malicious communication.
But what about Privilege Escalation? That brings us to our next question.
- How can I tell what credentials were used and what happened next?
If I suspect the username ‘matt’ is compromised, I simply enter it in the search box and use the same visualization I used for questions #1 and #2.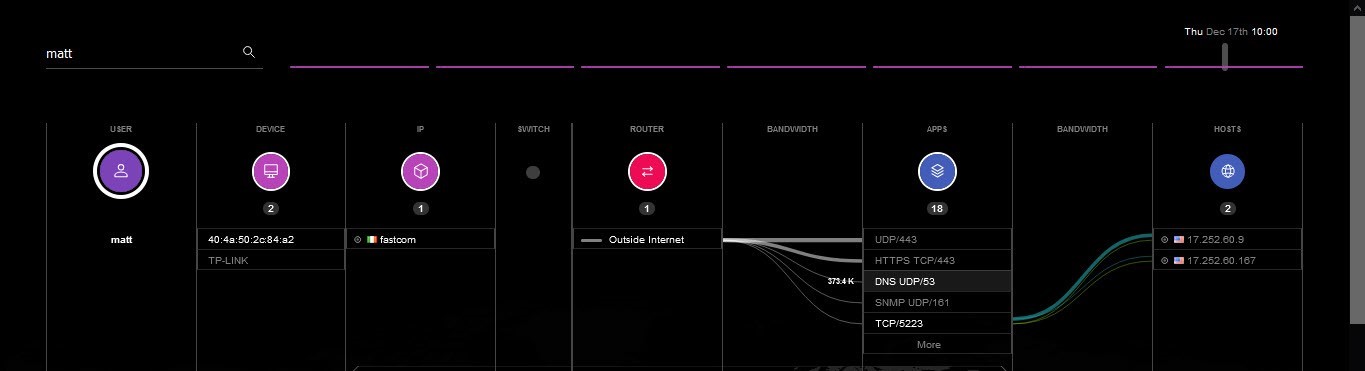 Figure 2: Enter a compromised userID and find all associated devices, routers, ports, and more.Looking at this screen, I know where ‘matt’ connected from, to which devices, through which routers, and so on, all the way to every individual destination server. Often, relying on separate teams and tools this analysis can take hours or days when time is of the essence.
Like recovering from a fire in your building, dealing with the aftermath of a major incident is challenging, but with the right preparation and recovery tools, you’ll be back to business-as-usual operation quickly and safely.